Step-by-Step Installation Guide for Cable Trunking Systems
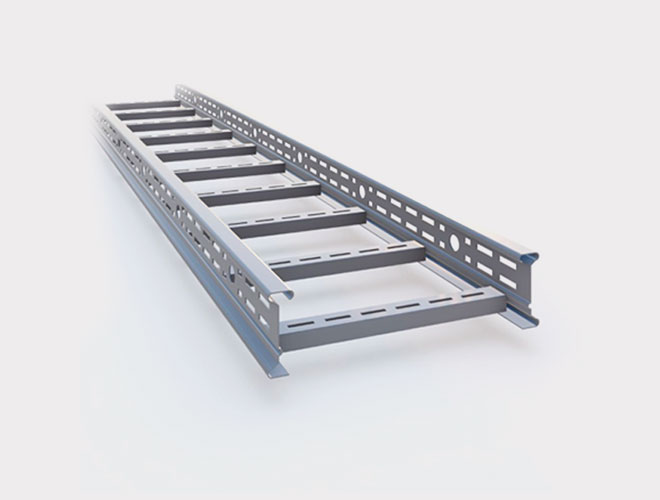
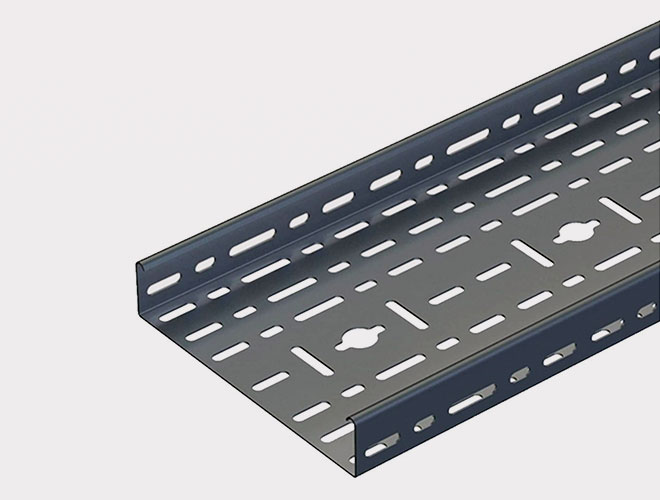
Cable trunking systems play a pivotal role in ensuring that electrical cables are safely and efficiently managed. The purpose and benefits of using cable trunking cannot be overstated. These systems not only protect cables from physical damage but also keep them organized and accessible, which reduces the risk of electrical failures. By organizing cables into a structured system, it minimizes clutter and potential hazards such as overheating or short circuits. The types of cable trunking systems include plastic, metal, modular, and flexible trunking, each serving specific applications based on the environment and the number of cables to be routed. Proper installation is essential as it impacts safety, organization, and future accessibility of the cable system. Moreover, by avoiding common mistakes, such as improper cable grouping or lack of support, the overall performance of the system is enhanced. The following step-by-step approach will guide you through the successful installation of a cable trunking system.
Tools and Materials Needed for Installation
Essential Tools
Before beginning the installation of a cable trunking system, having the right tools and materials is essential. These include basic tools like a measuring tape, level, drill, screwdriver, and cutting tools. These tools will help ensure accurate measurements and clean cuts during the installation process. Additionally, you will need cable trunking supports, brackets, and connectors to mount and secure the trunking along the planned paths. Properly selecting the right trunking system is crucial to the success of your installation. Factors like size, material, and the environment in which the system will be installed should influence your choice. For instance, if you’re working in an industrial setting, you may need metal trunking for heavy-duty protection. Understanding the load capacity and capacity expansion of the system is also important to ensure it accommodates future cable needs. Moreover, proper safety gear, such as gloves, goggles, and safety boots, should be worn to avoid any potential injury during installation.
Planning and Preparation for Cable Trunking Installation
Site Assessment and Planning
The installation area must be assessed before beginning any work. Whether the installation is for residential, commercial, or industrial settings, you need to evaluate the space and plan the cable paths accordingly. This involves deciding on the layout design for the trunking system, ensuring that the cables are routed in a way that will not interfere with other utilities or obstacles. Once the path is planned, measuring and marking the installation area is crucial to avoid errors. Accurate measurement techniques are necessary to ensure that the trunking fits perfectly within the space allocated for it. In addition, it is essential to allow sufficient space for future modifications or expansion of the system. Preparing the cables before routing them through the trunking is the next critical step. This includes cable stripping, arranging, and grouping cables properly to prevent them from tangling or causing electrical interference.

Step 1: Cutting and Preparing the Trunking
Measuring and Cutting the Cable Trunking
Once the site is ready and cables are prepared, you need to measure and cut the cable trunking to the correct lengths. Using the right tools such as a saw or cutter will ensure that the trunking is cut cleanly and accurately. The measuring tape should be used to measure the exact lengths needed, and a level should be used to ensure that cuts are straight and aligned properly. Clean cuts are crucial to avoid any complications during installation and to ensure that the trunking sections fit together seamlessly.
Preparing the Edges
After cutting the trunking, the edges must be properly deburred and smoothed to avoid damaging the cables. This step is particularly important for metal trunking, which can have sharp edges that could potentially harm the insulation of cables. Smoothing out the edges ensures that the trunking is safe for both the cables and the installer.
Safety Considerations
When handling and cutting trunking materials like metal or plastic, safety should be a top priority. Wear appropriate personal protective equipment (PPE) like gloves and goggles to prevent injury from sharp edges or dust. Properly handling the trunking materials also reduces the risk of damage to the trunking or cables.


Step 2: Installing Mounting Supports and Brackets
Marking Locations for Supports
To begin the installation, it is essential to mark the locations for supports accurately. These supports are critical for ensuring that the trunking system is mounted securely. You should space the supports evenly to avoid sagging and to ensure the trunking stays in place over time.
Fixing Brackets and Supports to Walls/Ceilings
Once the locations are marked, you can fix the brackets and supports to the walls or ceilings using appropriate anchors or screws. This step involves drilling holes into the wall and using anchors for securing the brackets, ensuring a firm and stable installation. Properly fixing the supports is vital for preventing the trunking from falling or shifting during use.
Checking Alignment and Level
Before finalizing the installation of the trunking, always check the alignment and level of the supports. Use a level to ensure that the supports are straight and that the trunking will be installed without any twists or bends. Proper alignment helps in the smooth installation of trunking and ensures that the system is both safe and functional.
Step 3: Routing and Installing the Trunking
Placing the Trunking on Supports
With the supports securely in place, you can begin attaching the trunking to the supports. Place the trunking sections on the supports and secure them using the provided clips or screws. This is where the pre-measurements become crucial. Make sure the trunking fits snugly and securely in place, as any movement could affect the stability of the system.
Sealing and Joining Trunking Sections
To join multiple trunking pieces, you can use connectors or couplers to create a continuous pathway for the cables. It’s important to ensure a tight seal between each section to avoid accidental exposure of cables. Proper sealing ensures that the trunking system is safe from dirt, moisture, and external elements.
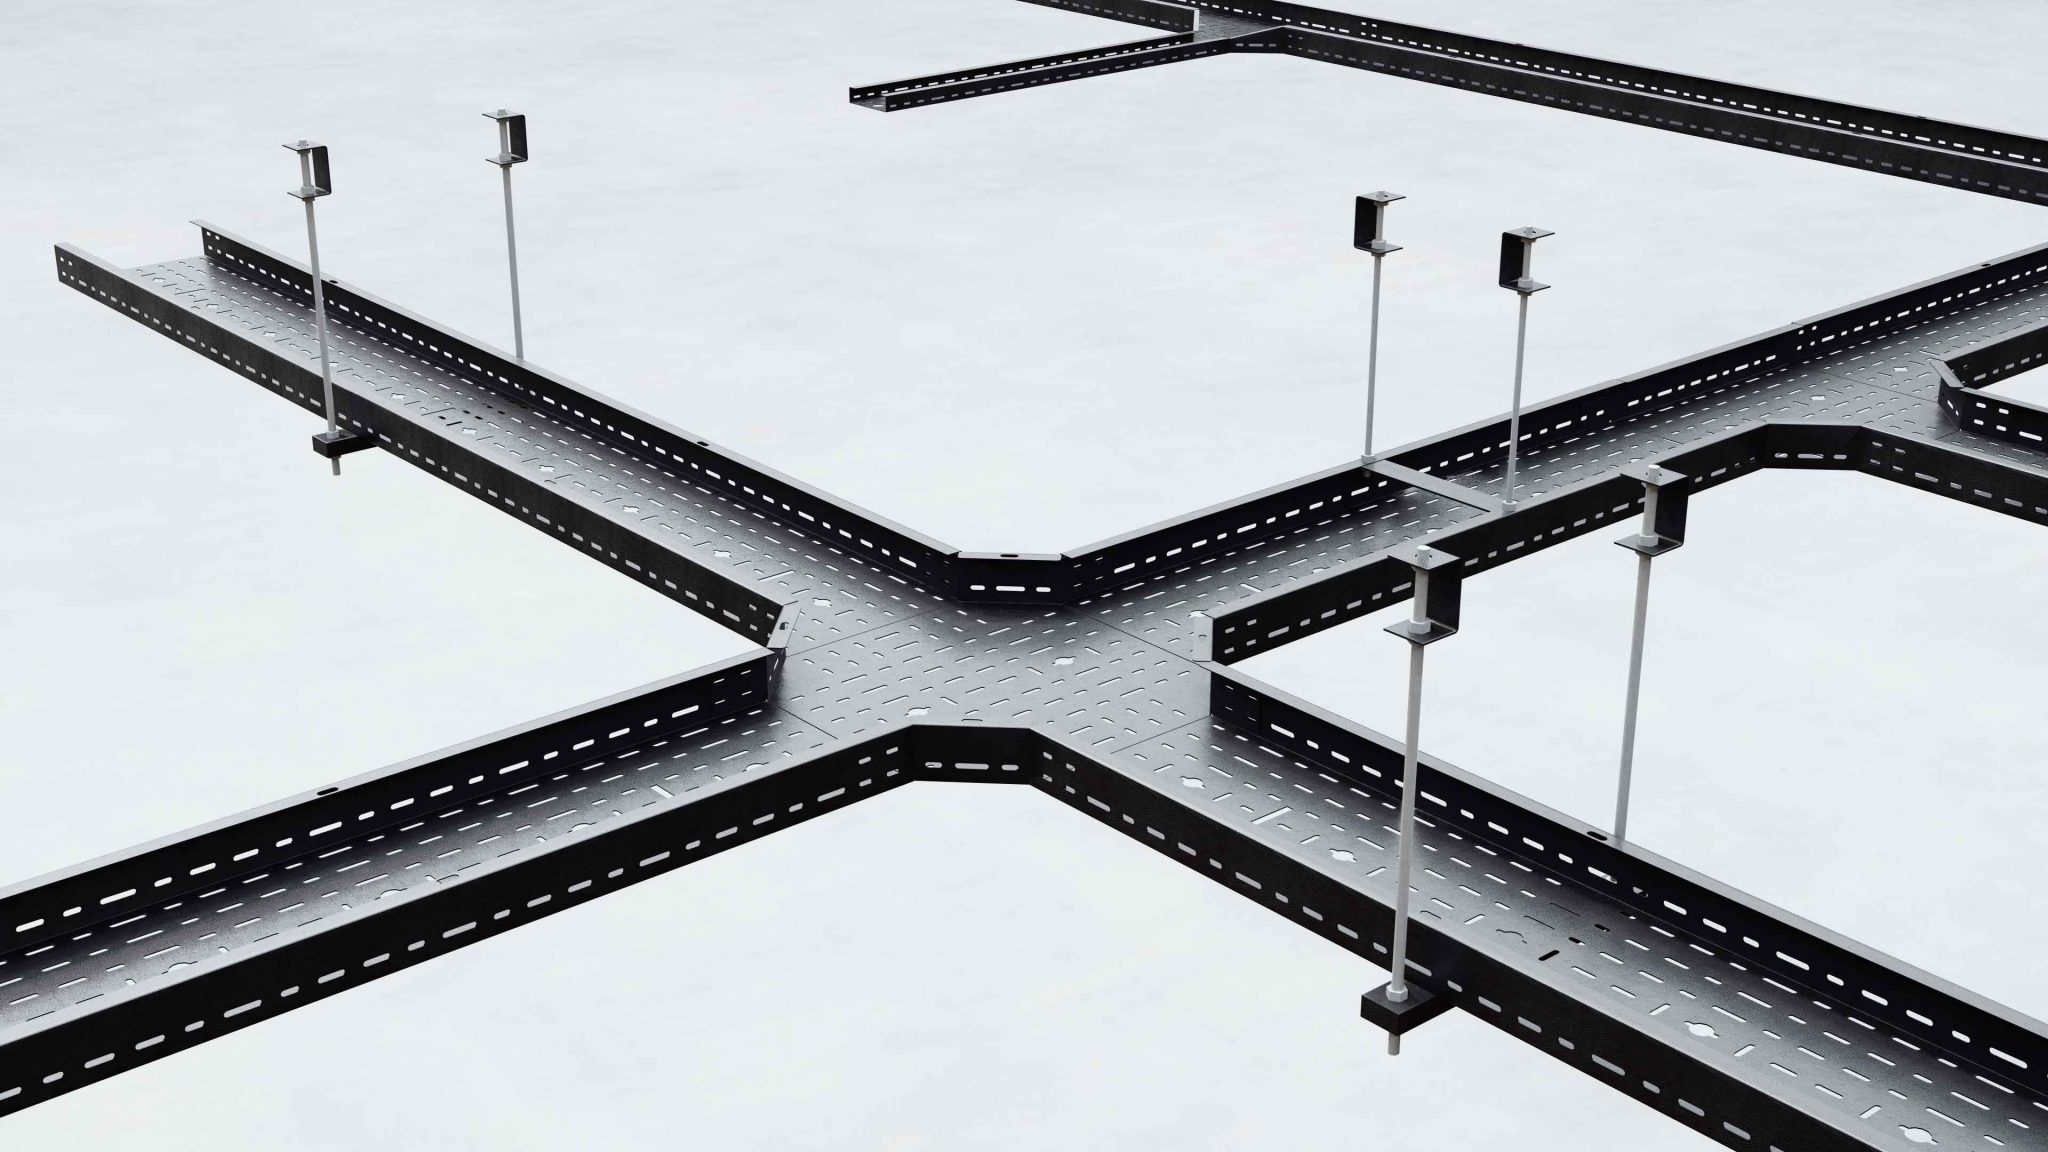
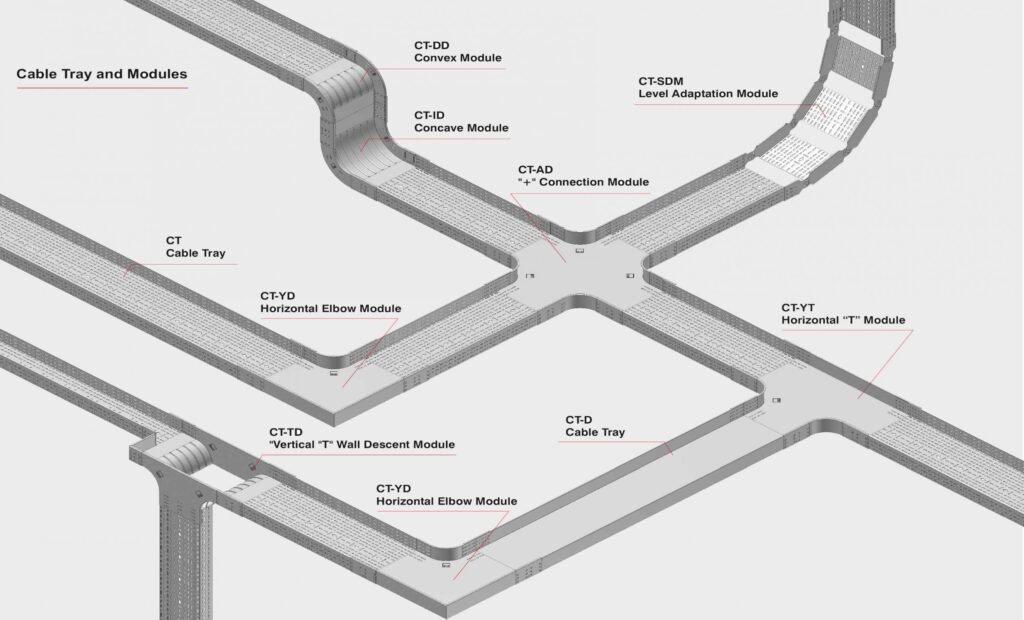
Adapting for Corners and Obstacles
Routing trunking around corners or obstacles requires special adapters or elbow connectors. Using elbow connectors allows the trunking to change direction without causing stress on the cables. These connectors should be fitted securely, ensuring a smooth and safe path for the cables. Properly managing these transitions ensures that the system remains safe and effective.
Step 4: Running the Cables Through the Trunking
Cable Insertion Techniques
When running cables through the trunking, it is essential to avoid damaging the insulation. Use proper insertion techniques to prevent nicking or stripping the cables. Always handle cables carefully to ensure that the insulation remains intact, preventing potential electrical hazards.
Cable Organization Inside the Trunking
To maintain a well-organized system, group and separate the cables inside the trunking. Use cable ties, clips, or internal dividers to organize cables efficiently. Separating power cables from data cables can help avoid electrical interference and potential signal loss. Keep the cables neatly arranged to prevent tangling, which could lead to overheating or damage over time.
Safety Checks
Once the cables are routed, conduct safety checks to ensure that the installation complies with electrical codes and regulations. Make sure that all cables are routed safely and that there is no risk of damage from external sources or wear and tear. Following safety codes ensures the longevity and effectiveness of the trunking system.
Step 5: Securing and Closing the Cable Trunking
Attaching the Trunking Covers
Once all cables are in place, the final step is to secure the covers of the cable trunking system. There are different methods for securing the covers, such as snap-fit mechanisms or screws. Ensure that the covers are tightly secured to prevent accidental exposure of the cables inside. Tight-fitting covers also protect the cables from dust and debris.
Ensuring Accessibility for Maintenance
While securing the covers is important for safety, you should also make sure that the covers remain easy to remove for future updates or maintenance. Trunking systems should be designed in a way that allows easy access to cables for inspection or modification. Easy access helps in maintaining the system and ensures that any necessary repairs can be made without significant disruption.
Final Inspection
After securing the covers, conduct a final inspection of the entire installation. Check that all covers are securely fastened and that no cables are exposed. Inspect the alignment of the trunking system, ensuring that there is no sagging and that the supports are firm. A thorough inspection will ensure that the system is safe and fully functional.
Step 6: Post-Installation Testing and Final Checks
Testing Cable Integrity and System Functionality
Before completing the installation, it is essential to test the cable integrity and overall functionality of the system. Use a multimeter to test for electrical continuity and verify that there is no damage to the cables. Ensure that all connections are intact and that there is proper insulation around the cables.
Checking Compliance with Codes and Regulations
Verify that the installation adheres to local electrical codes and safety regulations. Ensuring compliance helps in preventing potential hazards such as electrical fires or shorts. It’s important that the system meets national standards for fire safety, cable routing, and grounding to ensure long-term reliability.
Final Clean-Up and Maintenance Tips
Once testing is complete and all safety checks are passed, perform a final clean-up of the site. Dispose of any leftover debris, packaging, or materials. To maintain the system, ensure regular inspections and updates to prevent any wear and tear over time. Periodic maintenance ensures that the trunking system continues to function safely and efficiently.
Troubleshooting Common Installation Problems
Issues with Alignment and Mounting
If the trunking system appears misaligned or the supports are not holding the trunking in place, it’s essential to address the problem early. Recheck the measurements and adjust the supports as needed to ensure a level installation. This will help prevent the trunking from sagging or shifting over time.
Cable Overcrowding and Overheating
Overcrowding of cables can lead to overheating and potential damage to both the cables and the trunking system. Ensure that the trunking system is adequately sized for the number of cables being routed. If necessary, expand the trunking system or redistribute the cables to avoid overloading.
Loose or Damaged Connections
If the covers or supports are loose, this can create vulnerabilities in the system. Tighten any loose screws or connections to ensure that the trunking is securely in place. Regularly checking for loose connections and tightening them will help prevent long-term issues.
FAQ
The best way to install cable trunking systems involves a series of clear steps. First, assess the installation area and plan the cable layout. Measure and mark the area accurately, ensuring enough space for future modifications. Then, cut the trunking to the required length, install mounting supports and brackets, and route the trunking along the designated paths. Finally, insert cables, secure the trunking covers, and test the entire system to ensure compliance with electrical codes. Proper planning and safety precautions are essential to avoid common installation mistakes and ensure a safe, organized setup.
To ensure cable trunking is securely mounted, it’s important to properly space and align the mounting supports and brackets. Mark the locations for supports at regular intervals to ensure the trunking is level and does not sag. Use suitable anchors and screws to fix the brackets to the walls or ceilings, whether they are concrete, drywall, or other surfaces. After mounting the supports, always double-check the alignment to prevent any issues during trunking installation. This will ensure the system remains stable and durable.
Common mistakes to avoid during cable trunking installation include improper measurement, failing to leave room for future cable additions, and neglecting to use the correct supports and brackets. Another issue is overcrowding the trunking, which can lead to overheating and cable damage. Always ensure cables are routed with adequate spacing and are grouped according to type (e.g., power vs. data cables). Additionally, failure to properly secure the trunking covers can leave cables exposed to damage. Regularly inspect the installation to ensure all components are correctly aligned and securely fastened.
Tips for Successful Cable Trunking Installation
Recap of Key Steps for Installation: The installation of a cable trunking system involves several crucial steps, including measuring and cutting the trunking, installing supports, routing cables, and securing covers. Following the step-by-step guide ensures that the installation is successful and meets all necessary safety standards.
Best Practices for Long-Term Success: To ensure long-term success, maintain a clean and organized trunking system. Regular inspections and ensuring that the system is accessible for future modifications will prolong its lifespan and functionality.
Importance of Professional Help (When Necessary): For complex installations, especially in large-scale commercial or industrial settings, it’s essential to seek professional help. Professional installers have the expertise and tools necessary to handle intricate setups and ensure that the system is fully compliant with all regulations.